
Everyone who has known me for more than just a few weeks knows that I have Jet A1 running through my veins instead of blood. I just love aviation. However, given my bad eyesight, I never had any real chance of getting a pilots license, not even for ultralights or the like, so most of my flying experiences were relegated to cattle class seats on commercial airliners, or the odd paid sightseeing flight in a light aircraft. I briefly considered conventional remote controlled aircraft, but something about them just didn’t connect with me. Not that I would have had much time to assemble my own model aircraft given the hours I was working in the first years of my working life. Then came 2011, and a close encounter of the third kind in JFK airport’s Terminal 8. That close shave with a Parrot AR drone left me intrigued. However, the price wasn’t right, and that bloody device only supported iOS at a time when I was still firmly in the Android camp. I still kept an eye on the drone scene, but it wasn’t at the forefront of my mind, especially with my move to Ireland.
Not that the available drones would have helped, to be fair. There was just no drone that felt “right”. The Parrot drones, AR Drone, Bebop, and Bebop 2.0 felt cheap, while the DJI consumer drones, namely the Phantom series, felt rock solid and were great for photography and video, but were far too big for my taste. I did not need an hour of flight time, 4k cameras, and I was certainly not willing to pay a four digit amount for a drone. The DJI Mavic was tempting but still far too expensive for my taste. In real aviation terms, why buy an F-16, or a C-130 Hercules, when all you need is a Cessna 172 Skyhawk?
Then, in May 2017, DJI released their then newest drone, the Spark. That was a game changer. A compact, powerful drone with a good camera and a physical gimbal, something previously only seen on higher end drones. Granted, the flight time was limited, but for a first drone, that was some serious equipment right there. There was only one small problem - the price. At originally 599€ for the drone itself, and 799€ for the Fly More combo, that was still more than I was willing to pay. I did finally cave in a few weeks ago at Amsterdam airport, while coming back from arranging my dad’s funeral. It helped that the drone had been significantly discounted for Black Friday. Plus, I just needed something to get my mind of what had just happened.
One more thing about the wording. I’ll be referring to the Spark both as a drone and as an aircraft, quite simply because this thing is much more than just a toy, it is actually quite a sophisticated machine, and all the rules that apply to regular pilots will also apply to drone operators, but more on that later.
Aircraft Walkaround
 |
| There she is in all her boxy beauty. Please note that the rotor guards are attached in this image, as it was prior to an indoor flight. |
But enough of the exposition, I’ve been droning on for far too long. How is it? Well, for one, it is small. Much smaller than I had anticipated in fact, just seventeen centimetres across, and five centimetres tall. It is also surprisingly light, with a take-off weight of just 300 grams, way below registration thresholds in most civilised countries. The DJI Spark is available both as simply the aircraft and as part of the “Fly More” combo, which contains not just the aircraft, but a second battery, a full set of replacement rotors, a full set of propeller guards, a dedicated fast battery charger, a remote control, and a carrying bag. Colour-wise, the Spark is available in five colours, including DJI’s signature white. Considering the fact that the remote on its own costs 160€, the Fly More combo makes a lot of sense in my eyes. Granted, you can control the DJI Spark with just your smartphone, but I just find physical controls much more comfortable and convenient.
 |
| The Remote Controller folds up into a nice compact package. Really handy for transport. |
 |
| This is the remote unfolded and ready to go. The bracket can take quite a large variety of phones. |
As I mentioned above, the drone is pretty small, and fits into the palm of your hand. The entire airframe is made out of plastic, but it doesn’t feel cheap at all. Rather, it feels rock solid. As the Spark is a quadrocopter, the four motors and their accompanying rotors are located on four arms. Unlike the Mavic, these arms don’t fold, meaning that the drone is a bit bulkier than I’d like, but it’s really not a major issue. The front of the camera is dominated by two major elements. Right on top, there’s the sensor for the 3D Sensing / Obstacle Avoidance System. This not only theoretically prevents the Spark from flying into things, but also enables some rather interesting control options that I’ll touch on later on. Below that is the camera gimbal, which seems to be channeling the laser targeting system of an Apache helicopter judging by the looks.
 |
| The front of the Spark holds the obstacle avoidance system on top, while the camera gimbal is mounted below. |
 |
| The rear of the aircraft houses the USB port and microSD card slot. Please note that the power button is part of the battery. |
 |
| The bottom houses the sensors for what DJI calls the Vision Positioning system. Together with the front facing sensor, these help the drone track its immediate surroundings to avoid flying into trees. It also acts as an optical altimeter. |
 |
| Without the rotor guards installed, the Spark seems much less bulky. |
 |
| The battery sports its own LED charge indicator. The four metal squares allow the battery to be charged with the DJI Portable Charging Station. |
All joking aside, this is by far the most impressive part of the Spark. The 12 Megapixel camera is mounted on a two axis mechanical gimbal, which results in a much more stable camera platform. The Spark is NOT capable of recording 4k video, but does record 1080p HD video at 30 fps. The bottom contains the drone’s optical altimeter, and also the space for the battery. As for the rear, there’s not much to see there, with the main “attraction” being the cover for the Micro-USB port and the micro-SD card slot. As for the battery, that is a massive block, taking up almost a quarter of the drone’s body, and a third of its weight. The battery actually contains the On/Off switch for the entire drone, as well as a visual battery level indicator. DJI states that one of these batteries is enough for fifteen minutes of flight. I personally haven’t done an endurance test yet, but from the test flights I’ve done so far, a total flight time of 12-13 minutes seems reasonable.
Remote Control
 |
| As I mentioned above, the Remote Controller folds together into a nice compact package for transport. |
The Spark Remote Control comes as part of the Spark Fly More combo, or can be purchased separately. It is about the same sizes as the aircraft itself, with foldout braces for a smartphone, and two foldout antennas. Now let me just be clear that you can absolutely control the Spark with just a smartphone, and operate all it’s functions. However, you’ll be restricted to a distance of 100 meters from the operator, and a maximum height of 50 meters. With the Remote Controller, you’ll be able to operate the Spark at a maximum distance of 2 kilometers, and a maximum altitude of 500 meters, both way above most current legal limits, and way beyond what I would consider safe, but I digress. Physically, the Remote Controller is actually quite solid, and comfortable. Once inserted into it’s braces, a smartphone has pretty much no wiggle room. All buttons are easy and comfortable to reach, as are the two control sticks. Unlike the Spark itself, the Remote Controller battery is built in, and the handset is charged via a Micro USB cable, which isn’t really a big deal. Unlike its larger brethren of the Mavic Lineup, the Spark Remote Controller does not have separate display, with all aircraft data being displayed on the screen of your smartphone instead, but you don’t really notice that when flying the Spark. Please be advised that the Mavic and Smart Remote Controllers are incompatible with each other, and that you’ll need the controller that corresponds with your particular drone. There is no physical connection between the controller and the smartphone, apart from the holding braces. Instead, the phone logs into the WiFi hotspot of the controller. It is possible to connect the phone to the controller using a micro-USB cable, although I haven’t really heard of any compelling reason to do so. There certainly isn’t any major issue with lag or interference, none that I’ve noticed, anyway.
 |
| This shows the Remote Controller with my iPhone 6s after one of my first flights. |
Other Accessories
The Fly More combo also contains a dedicated fast charging station, a full set of prop guards, a full set of spare props, and a carrying bag. The fast charging station can charge up to three Spark batteries at a time, and the power adapter also includes to USB ports, so the remote can be charged at the same time as the other components. As pretty much all my test flights thus far have ended in two completely drained batteries, this charger has come as a godsend, as charging the drone through a Micro USB cable takes ages from my experience. I can’t really say anything about the spare rotors as I have yet to wreck the ones that came with the drone, but having a full set of spares is definitely a good thing. I’ve only used the propeller guards once during an indoor test flight, so once again, can’t really say much about them. However, once again having a full set available is really a good thing.
 |
| It may not look like much... |
 |
| ...but it can take almost everything you need to fly the Spark without bulging. |
The carrying bag itself is surprisingly well made for one that is included in such a combo. Granted, it’s not the biggest, a little larger than my old camera bag, but it can take the Spark, the Remote Controller, two batteries, a Micro USB cable for photo syncing, and a full set of spare props with ease. Some people have also managed to get the fast charger and its power adapter in there, however, barring some pocket dimensions or Harry Potter style magic, I can’t see how that’s possible. Not that I need it, as any expected “mission profiles” that would require me to take the charger with me would mean taking at least my large camera bag and an overnighter bag as well. From a more personal point of view, the drone bag is just the right size to fit into my Manfrotto NX Sling bag, together with my MacBook and it’s charger, my Pentax K-S2, it’s charger and adapter, my headphones, and the charging station and adapter for the Spark. Add my iPhone charger, and I’ve basically got my entire mobile blogging kit with me.
The App


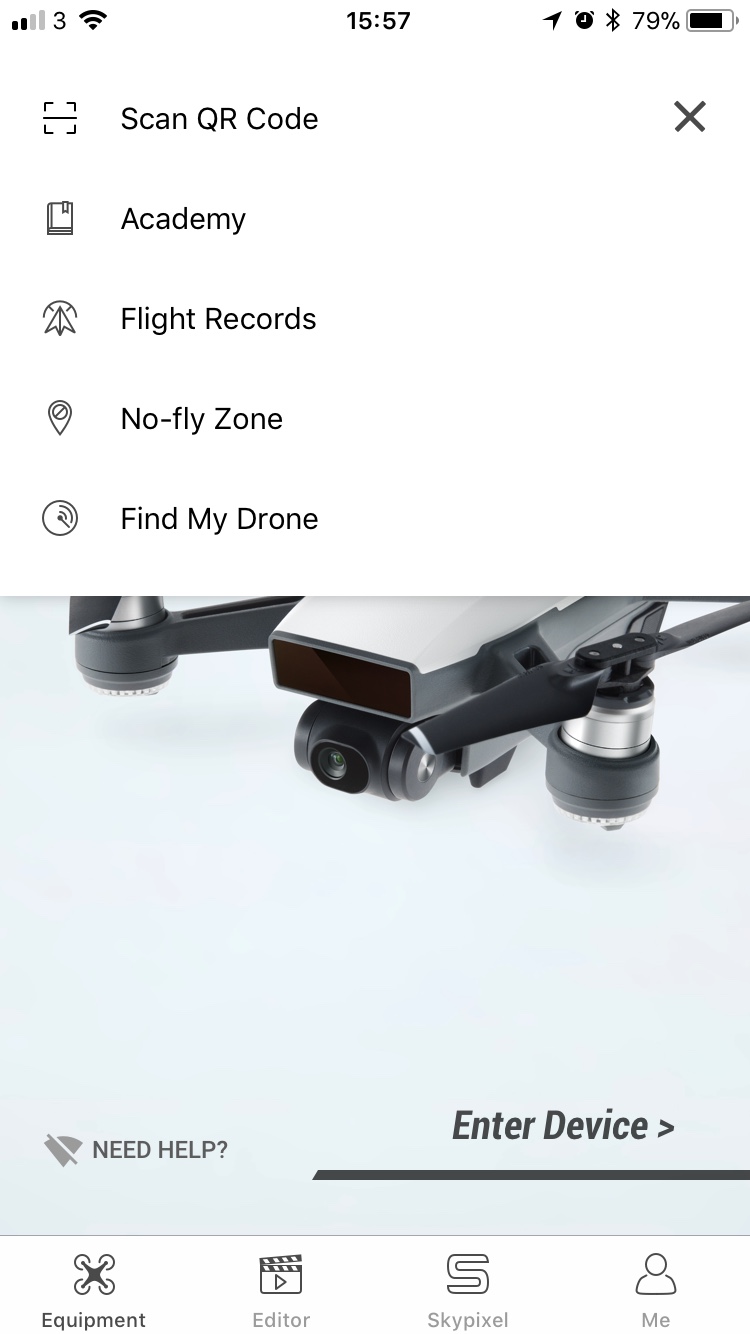
As one might expect for a device controlled by a smartphone, you need an app to actually use the Spark. With DJI, that app is called DJI Go 4, and you’ll need it regardless of whether you use the remote or not. This is basically your one-stop shop for all matters relating to your drone. You use it to register and set it up, to update the firmware for the aircraft, the battery, and the controller, to edit and upload the photos and videos you’ve taken, as well as for reviewing your past flights, and checking out any restricted areas, or straight up no fly zones in the vicinity. And of course, it’s the place from which you fly the Spark. Granted, all major flight controls are also available on the remote control, however, there are myriads of settings that are exclusively available from within the app, including manual camera exposure settings, and the app is also the only place where you can set custom distance and altitude limits, for example to comply with local regulations on drone flying. You also have access to what DJI calls the “Academy”, basically a basic flying course for newbie drone jockeys. Why this option is only available when the phone is linked with an active drone is beyond me, though.
 |
| Map playback of all flights is available, provided you had GPS or GLONASS coverage when flying. |
 |
| The DJI Go 4 App keeps a nice handy record of all your flights. |
 |
| The App has so many options that it would almost warrant an article in itself. |
Getting airborne
 |
| Believe me, you'll be seeing this screen a LOT before you can take off for your first flight. |
If you’re anything like me, then you just want to get this bloody thing up in the air ASAP! Well not so fast, hot shot! There’s quite a bit of setting up to do. First of all, the batteries were partially discharged and set into “hibernation mode” before being shipped, meaning that they need to be fully charged before they’re ready for use. Then, you need to set up an account with DJI, and register your drone to that account. Every Spark has a unique QR code in it’s battery compartment, as well as on the outside of the styrofoam transport box that comes with every drone, whether Fly More or not. There’s also a “Scan QR Code” function in the Go 4 app, however the QR codes on the drone are so small that I wasn’t able to scan them, as the camera on my iPhone 6s couldn’t get the code into focus due to it’s small size. Don’t worry, there is a manual registration and activation procedure, and there are actually really good video tutorials for it. It may take a bit, especially since you’ll invariably have to run a series of firmware updates on the drone, controller, and batteries before you’re ready to go. I won’t go into the details about taking off or operating the drone, there are far more qualified instructors out there, however I urge you to do the first tests outside in an otherwise deserted area and far away from any airports or major transport arteries. Also, when doing your first flights, keep “Beginner” mode active, especially if this is your first drone. Remember, that little bastard can reach up to 50 km/h in Sports Mode, can climb up to 500 meters above ground level, and operate up to 2 kilometres away from the controller, so you’re dealing with a rather powerful little aircraft. Never let your Spark go anywhere your mind hasn’t already been before, and always expect the unexpected.
 |
| Ready to go! |
Flying the Spark
 |
| Spark and Remote Controller following my first test flight |
The first thing I noticed when I powered on the Spark for the first time was that it was quite a noisy machine. Cooling fans for the flight computer kick in as soon as you power on the drone, followed by a three tone warning signal soon after. The same goes for the flight controller. LEDs in the four motor casings light up, as to the four green battery indicator LEDs at the back of the battery. Upon taking off, the drone rises to about 1.2 meters AGL, and awaits control inputs. The controls are rather crisp and precise, without being too nervous. If you’ve never flown a drone before, it may take some time to get the coordination between the two sticks right, but with enough practice, that shouldn’t be too much of an issue. Interestingly, once the drone is about 20-30 meters away, the engine noise becomes almost unnoticeable. The strobes on the engine pods are still visible though, although that all depends on the weather.
 |
| The LEDs in the motor pods are certainly bright enough to be seen even during daylight. |
 |
| The battery LEDs alway serve as a good indicator as to which way the drone is facing. |
Speaking of weather, I think it goes without saying that the Spark is a fair weather aircraft only. It is in no way, shape or form able to fly at night, or in inclement weather. It isn’t waterproof, either. It is however surprisingly stable in strong winds, even though the engine noise of the Spark as it tries to maintain its position might tell a different story. Even when the drone is buffeted by gusts, the two-axis gimbal will still make for a rather stable image for quite a surprising amount of time by counteracting the movements of the drone. However, when the gimbal can’t keep up anymore, that should be a clear indicator for every drone pilot to return home, ASAP.
 |
| View from the pilot's seat. Yes, this was prior to an indoor flight. |
Speaking of the gimbal and camera, the Spark streams live HD video back to the Go 4 App from the moment it and the controller are linked. This live feed also contains all major “instruments”, including airspeed and altitude indicators, GPS/Glonass signal strength, any warning indicators about airspace restrictions or any interference, as well as a battery indicator along the top of the display, the most vital indicator in my eyes, as it shows you not only the battery level, but also the remaining flight time. Don’t worry, these indicators don’t turn up in the actual photos. I won’t go into the different camera settings, as that would stretch this already long article even further, the camera controls on the remote however are quite snappy and effective, occupying the “shoulder“ buttons. The only one that takes a bit of getting used to is the gimbal control, also on the “shoulder” of the controller. I have yet to master a completely smooth upward or downward camera pan in video mode, but I’m getting there.
 |
| Taking off on the Lee Fields on my first test flight. |
 |
| View up the Lee valley. It's shots like these that made me want to get a drone. |
 |
| Overview of part of the Ballincollig Regional Park. |
The Spark also sports a number of specialised flight modes, which I haven’t really tried out yet, to be honest, as I’ve mostly gone flying during my lunch breaks at work. The one mode I have tried is Tripod mode, which dampens the movements of the drone, and enables smooth, professional looking moves. That mode works quite well, and has helped me get some decent video footage. So far, I’ve mostly limited myself to taking photos, however.
Speaking of which, the camera is actually pretty damn good, from what I can tell from my test flights so far. Granted, the Spark does not support 4K, as mentioned before, but to be frank, I haven’t really missed that feature, especially given the good image and video quality that I’ve gotten from my drone so far. I know that quite a number of reviewers have criticised the lack of 4K capabilities in the Spark, however from my experience, I find this criticism unfair, and even a bit disingenuous. Once again, I’ve pretty much only used the default setting, given the low amount of flying time I’ve had. However, even in that mode, the images are pretty good. I hope to get more photos and footage once the weather improves and I’ve completed the move to my new place.
Overall Impression
To be perfectly honest, I’m not quite in a position to deliver a final verdict on the Spark yet. From all I’ve seen and experienced so far, it is quite an impressive machine, especially given its diminutive size. It is supremely portable, even with it’s accessories, and from what I’ve seen, the flight characteristics are pretty impressive as well. However, my test flights so far have only scratched the surface. Make no mistake, this thing is much more than a Selfie drone, as it has been classed by some people. Due to this fact, I’ll probably have to return to the Spark in a few months, once I’ve racked up enough flights on it. Watch this space.
Given the length of this article, I’ll move my discussion about drone flying as such to another article, as there’s quite a bit to talk about in that regard.


Comments
Post a Comment